






Claw Machine
From delivery to live play — and how to fix common faults
Setting Up in 5 Steps
Unpack & Inspect
Remove all packaging and protective materials. The claw may be cable-tied for transit — remove these ties before you switch on.
Spotted damage? Email clawmachine@mysteryshirtinabox.info as soon as possible.
Everything's Included
Once unpacked, the machine is ready to plug and play. A key is supplied — it opens both the glass panel and the lower door.
Keep the key safe. You'll use it for restocking and to reach the controls.
Connect the Power
The power cable is inside the prize chute. Plug it into the socket on the back of the machine (bottom-right corner), then flip the switch on the back to on.
Power On Inside
Open the bottom door with your key. Inside are two buttons (red and yellow) and a power switch — click it to ON. The machine lights up and configures itself.
Card Terminal & Go Live
The card terminal starts automatically — give it a few minutes to load. Once it's ready, your machine is live. We monitor it remotely from here.
Frequently Asked Questions
What if I run out of balls?+
We have a system that tracks plays and wins and automatically notifies us when more balls are needed.
There have been a few wins in a row — is that a problem?+
This is normal and evens out as more games are played. If wins seem unusually frequent over a longer period, get in touch and we'll run a settings check.
Can the machine be moved after installation?+
Yes — although we recommend contacting us before relocating it to avoid damage or affecting performance.
How often does the machine need refilling?+
It depends on usage. High-traffic venues may need weekly refills, while quieter locations may only need refilling every few weeks.
What if the machine develops a fault?+
Contact our support team. Many issues can be resolved remotely, while others may require an engineer visit.
Who do I contact if I need help?+
Our support team is available during business hours, with emergency support available where included in your service agreement.
Common Faults
E6 — Sensor Alignment
An E6 error means the claw's position sensor has drifted out of alignment. It's usually a quick re-calibration with the adjustment knob while watching the indicator LED.
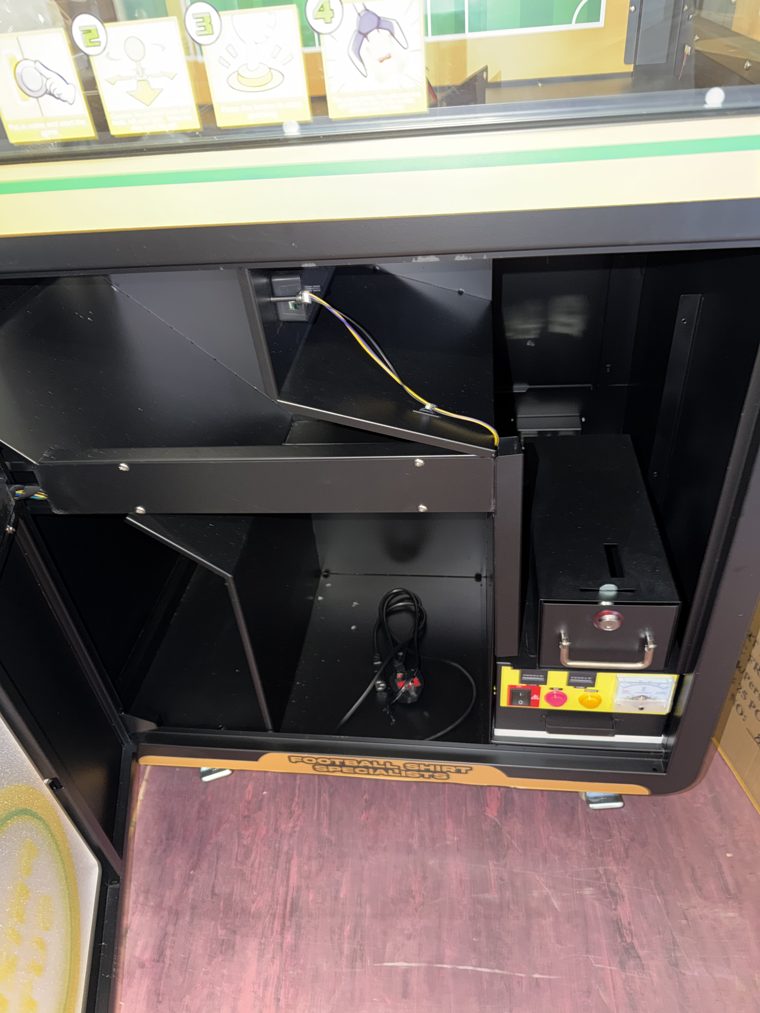
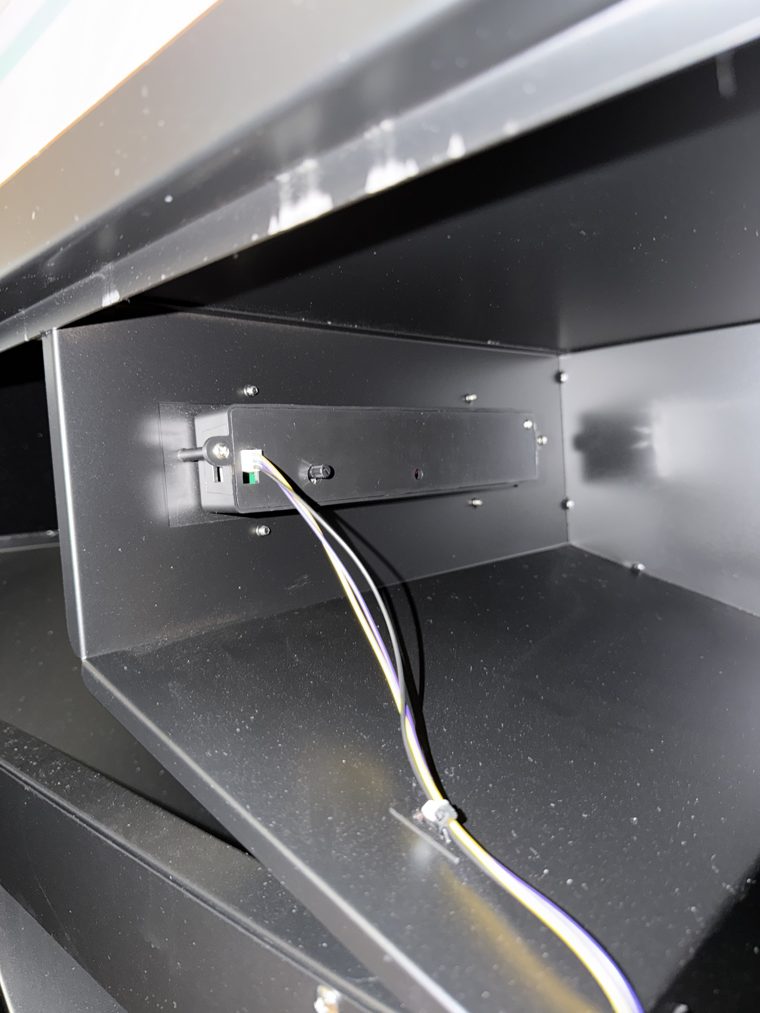
- 1Locate the small adjustment knob on the bottom half of the machine.
- 2Turn it very slowly — about ⅛ of a turn at a time.
- 3Watch the indicator LED on the right-hand end of the sensor.
- 4Stop the moment the LED changes state (on or off) — that's the alignment point.
- 5Move the carriage in and out to check the LED switches reliably.
- 6Restart the machine and check the E6 error has cleared.
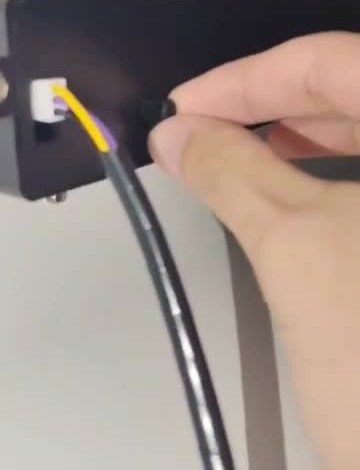
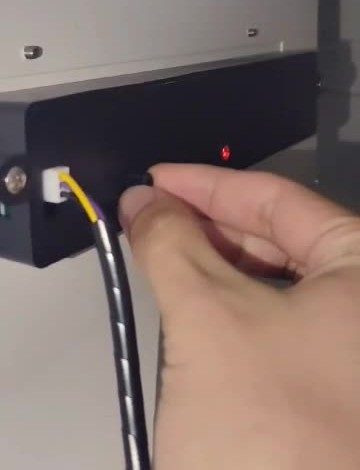
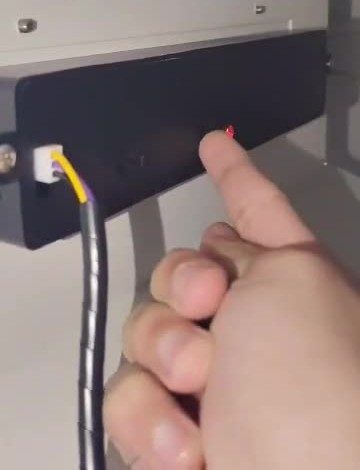
Don't force the screw — it usually rotates only about 270°. If the LED never changes, the sensor may be dirty, misaligned, disconnected or faulty. Get in touch.
E7 — Crane Sensors
An E7 error points to the crane's contact sensors. There are three to check — each must make contact with the blue bumpers as the crane moves: one to the left, one in the middle, one to the right of the crane head.
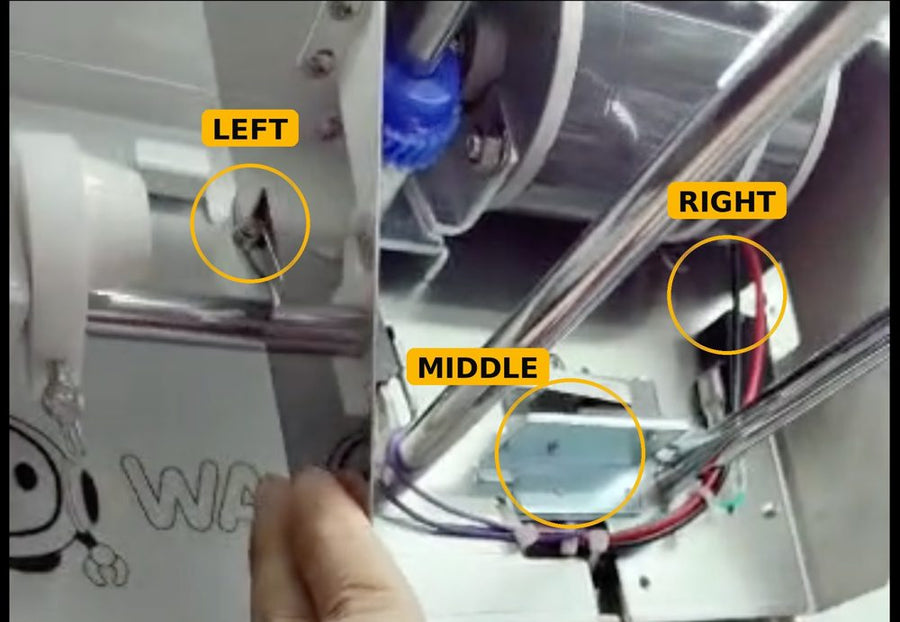
- 1Open the upper section to reach the crane assembly.
- 2Locate the three contact sensors across the crane head.
- 3Move the crane and watch each sensor in turn.
- 4Check each makes contact with the blue bumper — left, middle and right.
- 5If any isn't contacting, gently adjust it until it does.
- 6Confirm all three contact reliably, then restart and check E7 has cleared.
Adjust gently — the sensors and wiring are delicate. If a sensor still won't make contact, it may be dirty, bent, disconnected or faulty. Get in touch.
E8 — Claw Won't Move
An E8 error means the claw isn't raising or lowering. It's usually the rope jammed or off its spool inside the crane head.
- 1Restart the machine and watch the claw — it should move down, then back up.
- 2If it doesn't move at all, open the cover of the crane head.
- 3Check the rope on its spool — it may be stuck, tangled or off the pulley.
- 4Restore the rope so it runs correctly on the spool and pulley.
- 5Restart and check the claw moves up and down again.
- 6Close the cover once it's moving freely.
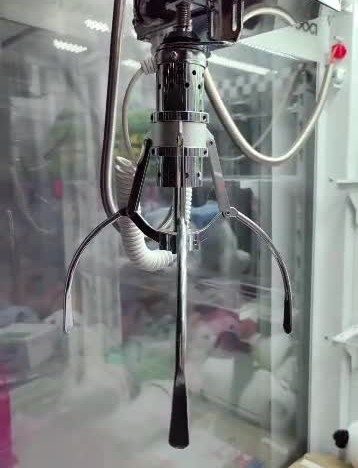
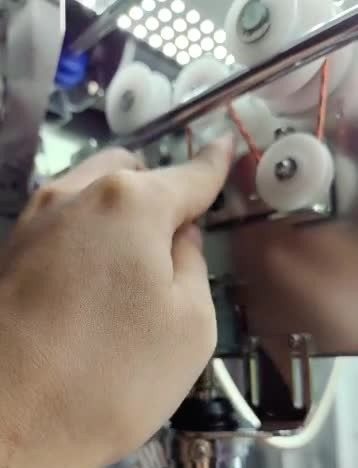
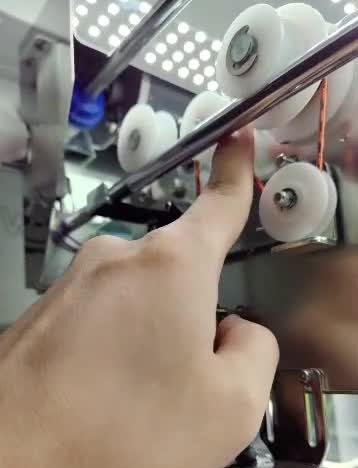
Be gentle with the rope and pulley — don't force the mechanism. If the claw still won't move, or the rope looks damaged, get in touch.
Questions? We're Here to Help
Any problems during setup, get in touch — most issues we can sort remotely.
Still Having Issues?
Worked through the steps and the machine still isn't right? Raise a ticket and our support team will take it from there.
clawmachine@mysteryshirtinabox.info